Week 8: Development, Initial Login System & NHS Meeting
This week we have implemented a basic login system, continued to build the statistics page, and built an initial Manage URLs page. We also met with the NHS Identity team.
Login System options
NHS Identity Meeting
This week we met with the NHS Identity team to discuss our potential use of NHS Identity on our platform.
The meeting involved introductions of us all and discussing our project, the requirements, data storage and privacy concerns, and a deep dive into NHS Identity (what it is, how it works, and what it aims to solve).
We learnt a lot about NHS Identity and how the onboarding process is. It was made more apparent to us that the onboarding process through to production use of NHS Identity may take several months, as there many checks and tests are required, e.g, a penetration test.
An alternative option was suggested in the meeting: using the login system of NHS Mail, which possibly uses an OpenID Connect interface. We will be researching more into this option.
The NHS Identity team also helpfully provided us with a contact in NHS Wales, who we have reached out to for any Wales-specific advice they may have.
Digital Health Ecosystem Wales
We have a meeting scheduled with the Digital Health Ecosystem Wales team next week, where we hope to learn more about their system and discuss our requirements.
Alternative login system
Over the past few weeks it has become clear that we would not be able to implement official login route before Christmas at the earliest, due to the requirement of arranging meetings, conducting extensive research, and experimenting with different technologies.
Keycloak was originally mentioned to us by our client a few weeks ago, as a suggestion to research if it was feasible and/or useful to us in our project.
Keycloak is an “open source identity and access management” solution which aims to provide secure authentication to applications simply and easily to developers.
Over the last two weeks, we conducted research into Keycloak, which involved determining its usefulness, features, integration effort, reading through the documentation, and planning how to implement it. We found various features appealing:
-
LDAP and Active Directory support
Keycloak has built-in support for LDAP and Active Directory (AD). In earlier weeks, we were considering if the NHS used AD but weren’t able to confirm many details, however as there was a high chance the NHS do use AD, this was comforting as we would be able to integrate with their system at a later stage if required.
-
Standard protocols
By default, Keycloak supports OpenID Connect (OIDC), OAuth 2.0, and SAML 2.0. These are all extremely common and standard authentication systems which would mean we can create a system that is easy to integrate and adapt in future, which is extremely important for us as our aim is to make the system really be used and integrated in the NHS.
-
Identity Brokering
An extremely appealing feature was Identity Brokering, where we can connect one or more Identity Providers (IdPs) to the Keycloak instance and use them as our authentication backends. In effect, this would mean we could have various different authentication services to allow users from all areas of the NHS to login to and use the system, if we were to integrate with the various login options in the NHS.
-
Documentation
Keycloak has extremely detailed, versioned, helpful documentation covering all aspects of installation, configuration, advanced usage, and deployment. After reading through a large chunk of this documentation prior to implementation, we were confident that it would suit us well and we were happy to go through with the implementation.
As a result, this week we implemented a login system using Keycloak, to handle users and their roles:
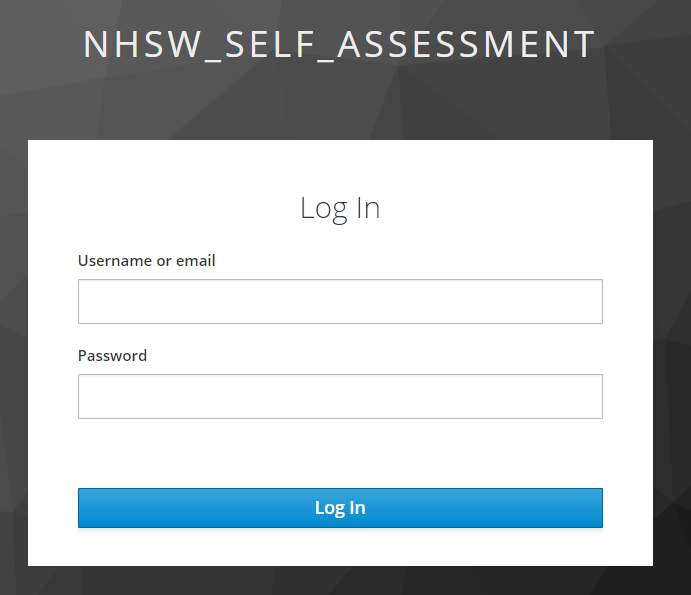
The Keycloak-provided login page for the web-app
Details of this implementation are provided in the next section.
Development: Login system
The implementation of our login system using Keycloak took a large chunk of several days, as we learnt exactly how Keycloak is intended to work. At its core, the implementation consisted of:
- Adding a new container to our Docker Compose configuration, using the official Keycloak Docker image
- Creating a new database for Keycloak to store user credentials, sessions, etc. in our existing PostgreSQL Docker Container
- Experimenting with a Keycloak instance locally, and configuring a Realm, Client, Roles, and Users
- Exporting the Realm JSON configuration, and configuring the Docker Container to load this configuration on first run
- Using NextAuth.js to handle the interaction between the web-app and the Keycloak instance, to authenticate users
- Updating the web-app to use the session to determine when users are logged in, and what role they have
- Deploying the new Docker Compose configuration, along with HTTPS (using a domain name)
We faced various challenges in implementing this. For example, using Docker Compose to create multiple PostgreSQL databases proved to be difficult. Following research, we ended up using a shell script which executes on first run of the container to initialise the databases, which seemed to be the recommended approach by PostgreSQL.
Another challenge we faced was understanding that Keycloak provides the user management itself, without having to set up an Identity Provider manually. It turns out that we were over-complicating the configuration procedure by trying to set up a custom default Identity Provider, rather than letting Keycloak manage the authentication by default.
We then used NextAuth.js to interact with the Keycloak instance from the web-app side. This implementation was fairly simple, after we determined exactly what configuration we required to configure Keycloak as a Custom Provider in our code. Luckily, as OIDC is built on top of OAuth 2.0, we could create this as a custom OAuth provider in NextAuth.js. We tried writing various configurations until discovering that we had to create a Protocol Mapper to allow the roles scope to work in the following config:
{
  id: 'keycloak',
  name: 'Keycloak',
  params: { grant_type: 'authorization_code' },
  scope: 'openid roles',
  type: 'oauth',
  version: '2.0',
  accessTokenUrl: `${process.env.BASE_AUTH_URL}/token`,
  authorizationUrl: `${process.env.BASE_AUTH_URL}/auth?response_type=code`,
  clientId: process.env.CLIENT_ID,
  profileUrl: `${process.env.BASE_AUTH_URL}/userinfo`,
  profile: profile => ( { id: profile.sub, name: profile.preferred_username } ),
}
We made use of environment variables to keep configuration settings e.g. URLs easily accessible and changeable, as well as keeping any relevant details secret in Git.
One more challenge was the requirement of HTTPS; as we were now dealing with private, secure information, we needed HTTPS to use Keycloak on non-localhost environments. Configuring HTTPS on a bare IP address turned out to be too much of a hassle to justify doing temporarily. As a result we are now using a domain name with SSL certificates from Lets Encrypt (which is handily managed by Caddy running on our production VPS instance).
At this moment in time, we are using a personal domain name. However we have gotten in touch with our client to see if there is a preferred domain name we should register for this system.
Development: Statistics Page
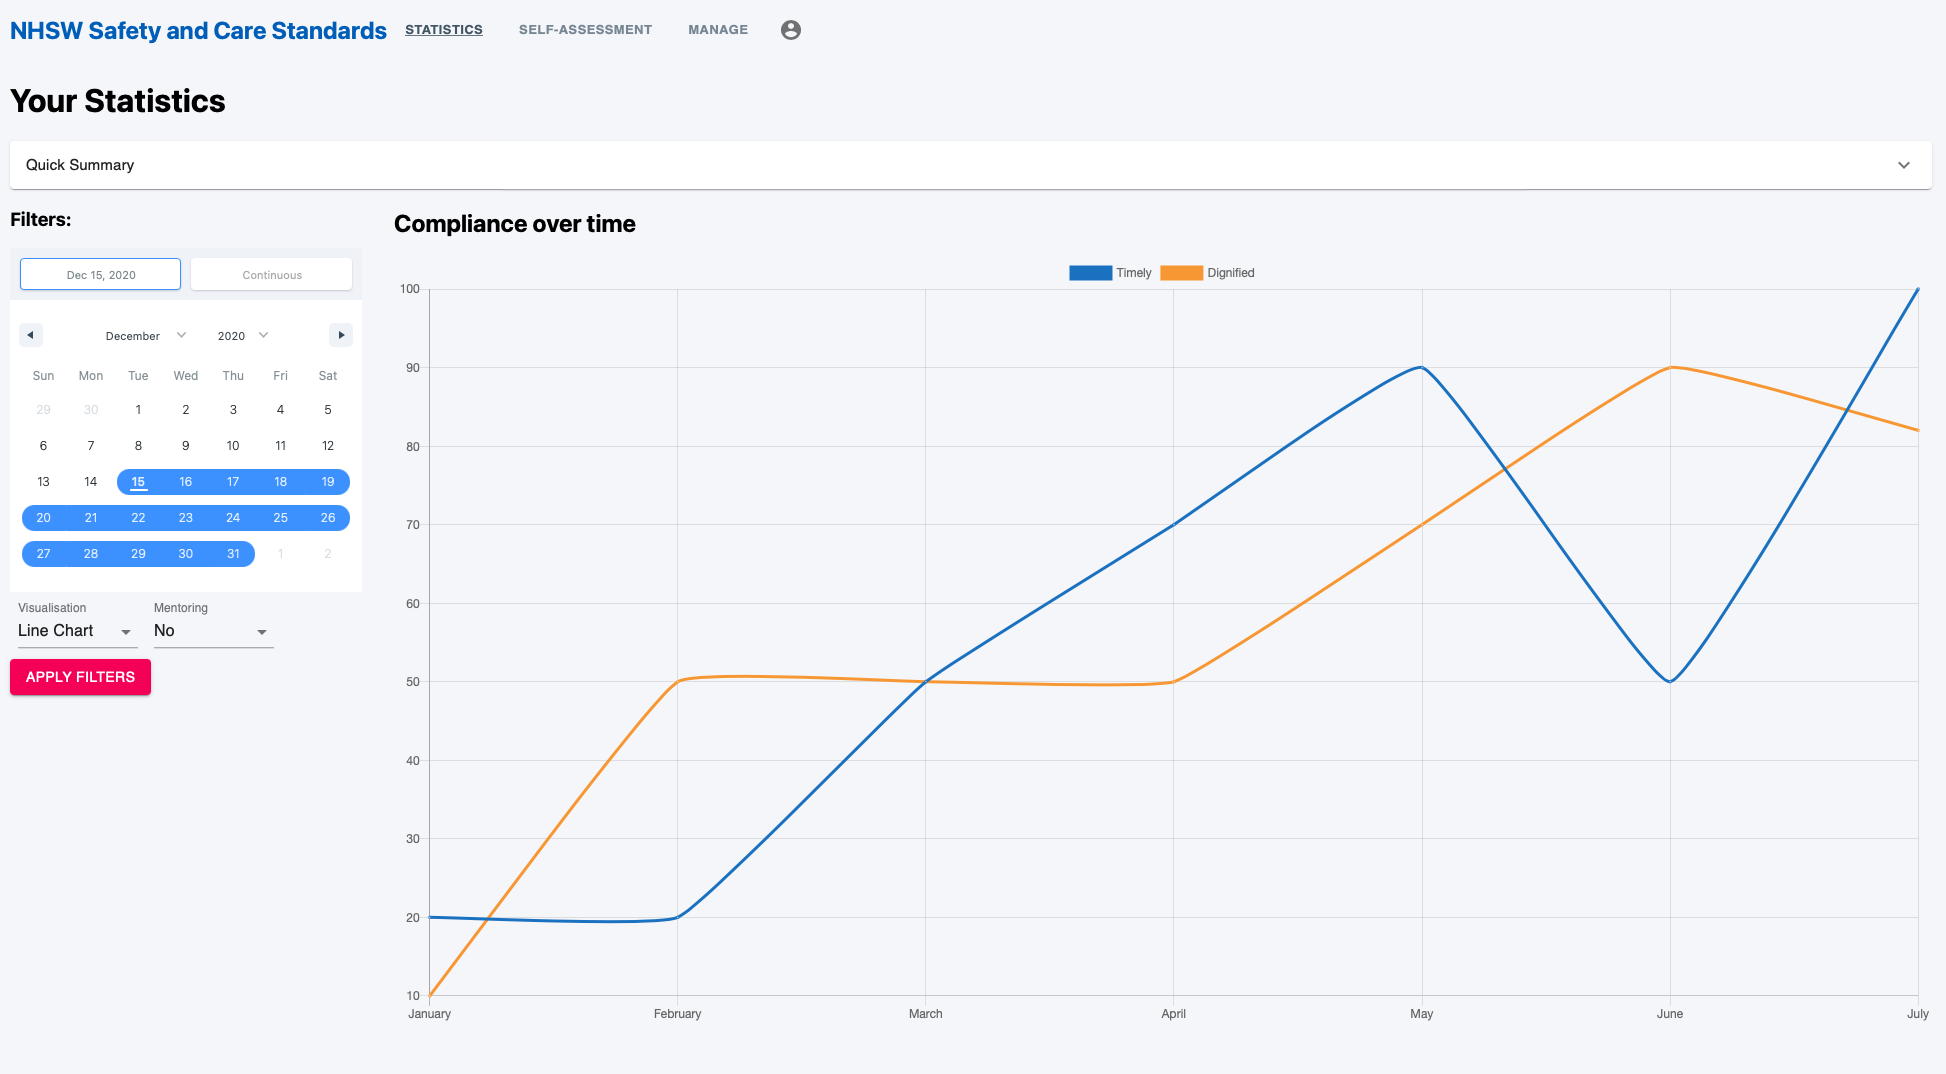
This week we continued building the statistics page with all the features we require for our system.
We continued working on the <GraphWrapper/> component that consists of filters, legend and a graph. This component will take data from the API based on the what the filters specify and then display this using the graph component from Chart.js.
The focus of this week has been on the Filter component and the overall styling of the page. We worked on making the dimensions of the <Filter/> component and the <LineChart/> component to appropriate sizes using CSS. We found this tricky at first, as combining custom CSS with the Chart.js and Material UI components wasn’t as obvious to accomplish.
The <Filter/> component has itself a button (Apply Filter), a <DateFilter/> component and a <VisualisationFilter/> component. For the <DateFilter/> component, we used the [react-date-range](https://hypeserver.github.io/react-date-range/.) component. Finding an appropriate date-picker component was also tricky, due to the large variety of components available, however we decided on using this one as amount of documentation, examples, and core functionality was easy to understand and implement.
Concerning the <VisualisationFilter/>, we used the Material UI <NativeSelect/> component (https://material-ui.com/components/selects/) which allows us to select the visualisation that we want for the graph (for the moment: Line Chart or Pie Chart) as well as allowing the user to visualise the data depending on if it was a Mentoring Session or not.
We also updated the backend to add support for filtering the responses by different parameters. For example, we added to, from, dept_id, etc. query parameters to the GET /api/responses endpoint, so that the frontend can easily fetch only the required data. The advantage we feel this approach has over letting the client (web-app) computing the filtered data is that we don’t need to send as much data across the network, and the client device doesn’t have to worry about the filtering logic, allowing the backend (which is a more powerful server) compute only the required data.
Below is a screenshot of the current state of the statistics page:
Development: Manage URLs Page
We created our first version of our Manage URLs page this week, with temporarily hardcoded data that we plan on swapping out next week using our API.
The main bulk of the Manage URLs page comes from the Material UI <Table/> component which allows us to have a container to display the questions, their standard and URL neatly.
We then used the Material UI <Button/> and <Input/> components in conjunction with state and some logic to display input boxes for new URLs when the user clicks the edit URL button.
The two states of the Manage URLs page are shown below:
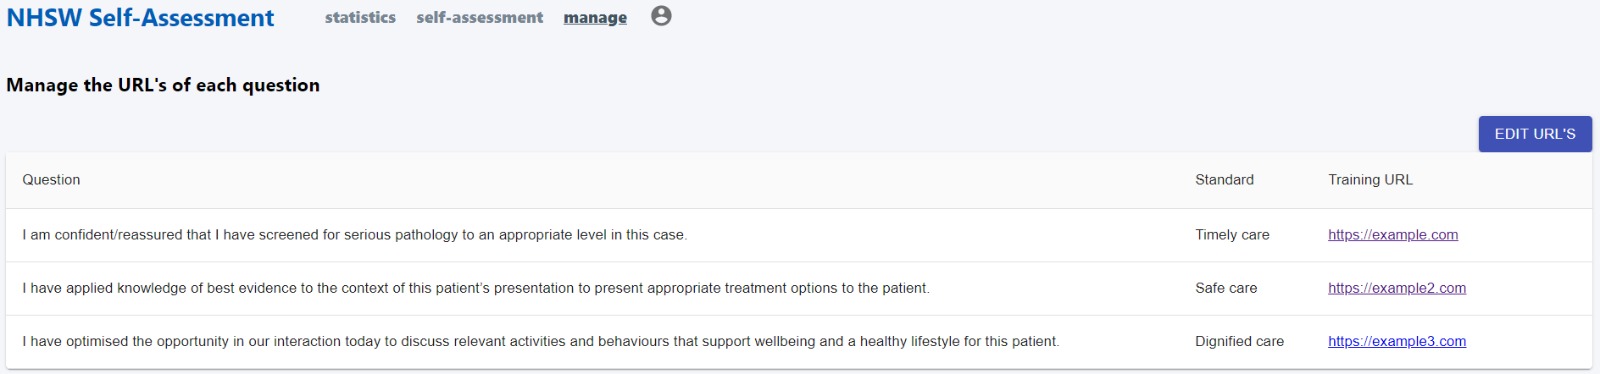
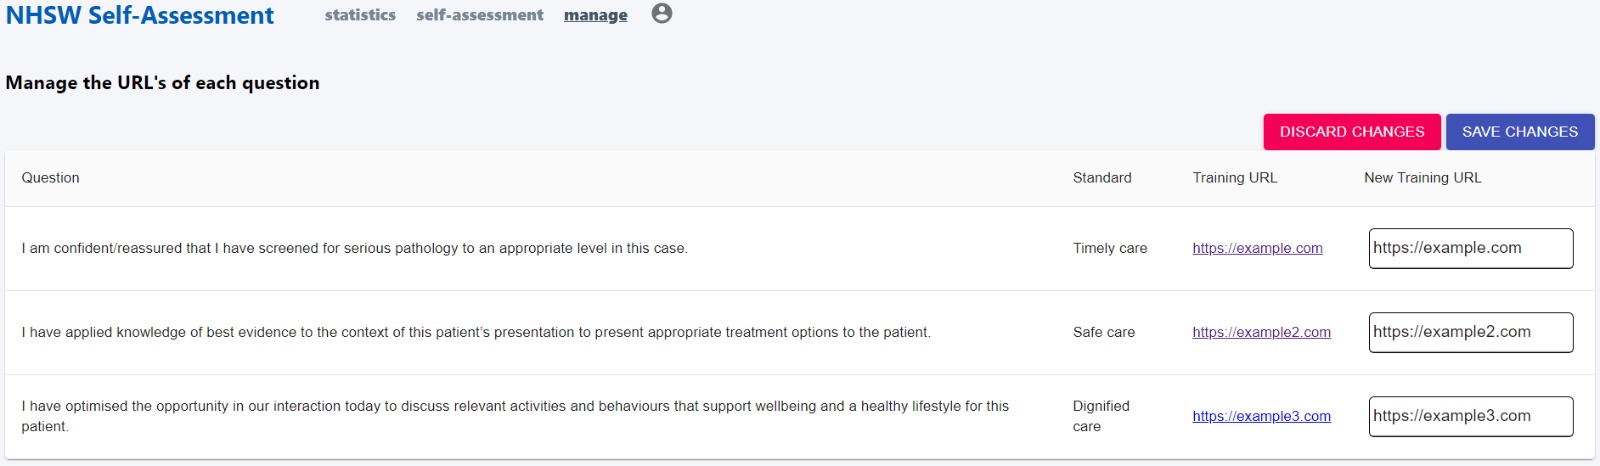
When the edit button is pressed this brings up two new buttons, which allow the user to discard the changes they have made (so the URLs are not updated and the page goes back to previous state) or save the changes (which update the URL’s in the table). This is a slight change from our prototype but we feel having centralised buttons for updating/discarding changes for all the URLs is less ambiguous for the user and will improve their experience.
Next Steps
Our next steps consist of emailing the NHS Wales contact given by the NHS Identity team asking for advice and suggestions with regards to a login system.
We also have a meeting with the Digital Health Ecosystem Wales team next week where we hope to make progress concerning the login.
We will also be working on improving the login system as a whole (backend), and considering our registration/user onboarding flow (e.g. how will users register and specify which department/hospital/health board they are in?).
Concerning the frontend, even though we are nearly finished with it at this stage, we still wish to make style improvements (responsiveness of the platform for different screen sizes e.g. a mobile view) but also connect the Manage URLs and the Statistics pages to the API to use real data.